


October 31, 2010
October 25, 2010
raviules
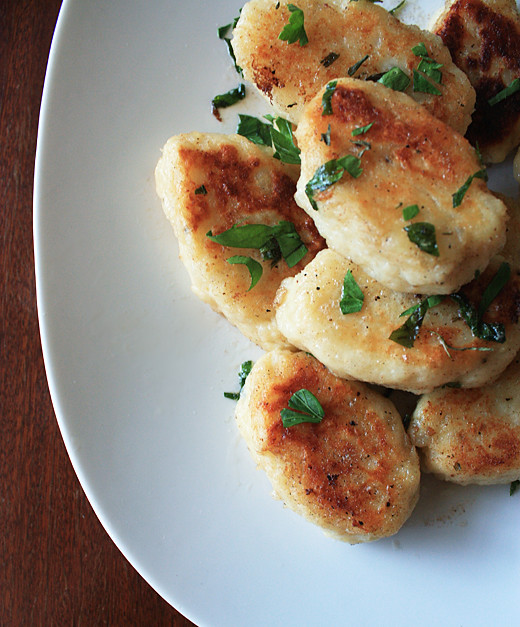
I'm not going to pretend I had any idea what raviules were before I saw them in an issue of Australian Gourmet Traveller, but as soon as I saw the photo of them, I knew they had to be mine. They are, according to AGT, "essentially a French version of gnocchi." I have no idea to pronounce "raviules," either, so I find it easier just to call them tasty potato friends.
I wasn't making these for a special occasion, but they're absolutely dinner-party worthy. They'll require some last minute frying, but if you don't mind that, then it's easy to prepare them to either one of two stages in advance: after the shaping, when they can be refrigerated quite happily (and I think the fridge time helps firm them up, ready for boiling), or after the boiling, though they shouldn't be refrigerated at that point. So you could even mix and shape them the day before, boil them in the afternoon, and quickly fry them (a 10 minute job at most) right before you serve.
The recipe calls for chervil, which I couldn't find in either fresh or dried form at any of the 3 grocery stores I tried. I used fresh flat leaf parsley and a little tarragon instead. Plain parsley would be fine, but the aniseed flavour of the tarragon lended that extra chervil-like something.
Raviules
adapted from Australian Gourmet Traveller
500g Sebago potatoes (about 4), unpeeled
1 egg
50g plain flour, plus extra for dusting
4 garlic cloves, finely chopped
11g butter, coarsely chopped
1/4 cup loosely packed fresh flat leaf parsley, loosely chopped
a handful fresh tarragon leaves, or 1 tsp dried tarragon leaves
salt and freshly ground black pepper
Preheat oven to 180ºC / 360ºF. Place unpeeled potatoes in a roasting pan and roast until tender when pierced with a skewer (40-45 minutes). When cool enough to handle, cut potatoes in half and scoop out the flesh. Pass through a ricer / food mill into a large bowl, or mash very thoroughly. Add egg, flour, and one crushed garlic clove, season to taste and knead lightly until smooth. Shape mixture into quenelles and place on trays lined with baking paper. Refrigerate until ready for the next step.
Cook raviules in a large saucepan of boiling salted water over high heat until they rise to the surface (1-2 minutes). Remove with a slotted spoon, drain well, set aside and keep warm.
Heat butter in a large frying pan over medium heat until nut brown (3-4 minutes). Add raviules and stir to cat, then saute, turning occasionally, until golden brown (2-3 minutes each side). Add remaining garlic, parsley and tarragon, stir to combine, and serve immediately.
October 16, 2010
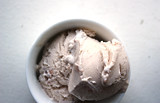
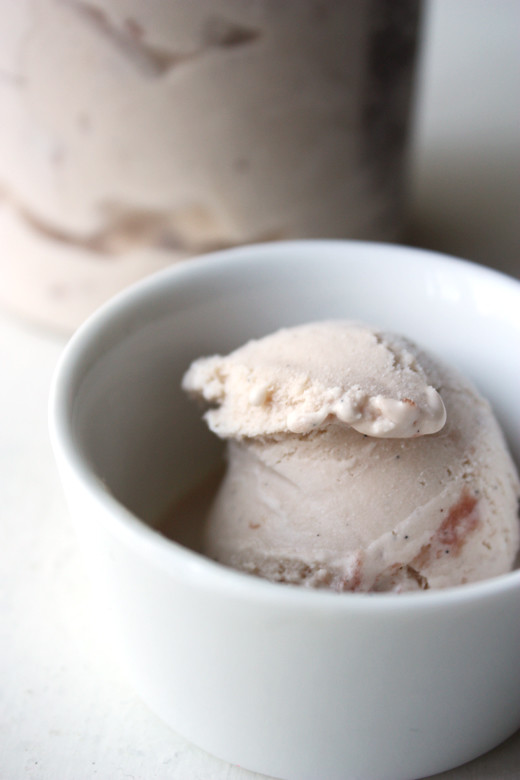
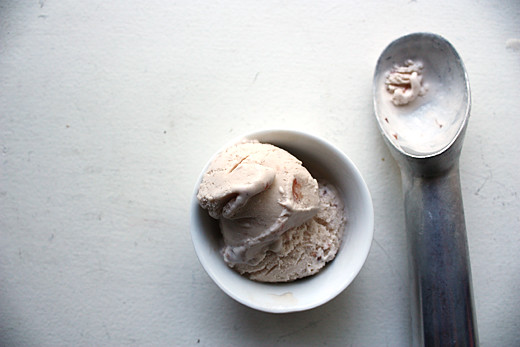
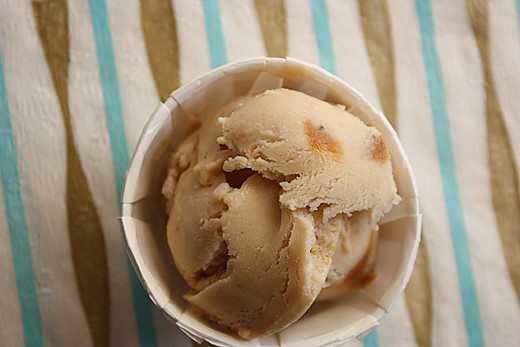
strawberry jam ice cream

Strawberry jam ice cream: pretty pretty pretty. And sweet in just the right subdued kind of way. It's lovely as a scoop on its own, and amazing mixed with meringue and raspberries. You MUST use homemade or good quality store-bought jam - the kind with chunks of fruit in.
strawberry jam ice cream
strawberry jam ice cream
from Simon Hopkinson, Week In Week Out
300ml full fat milk
1/2 vanilla pod, split lengthways*
4 egg yolks
250ml double cream
150-175g strawberry jam (homemade or quality store-bought)
Place a large metal bowl in the freezer (or at least the fridge). Gently heat together the milk and vanilla pod in a solid-bottomed pan. As it comes to the boil, give it a whisk so as to disperse the vanilla seeds into the milk. Cover, and leave to infuse for 20 minutes. Beat the egg yolks with a fork in a small bowl and then mix in a little of the milk to loosen them. Add this to the vanilla-milk mix, whisk together and then cook over a very gently heat, constantly stirring with a wooden spoon, until the mixture has lightly thickened - do not allow it to boil. Take the chilled metal bowl from the freezer (or fridge), pour the mixture into it, and whisk thoroughly to cool quickly. Now whisk in the cream. Stir in the jam, pour into an ice-cream machine, then churn and freeze according to the manufacturer's instructions.
* Because I can't afford to use a vanilla pod for every recipe that calls for one, I buy Nielsen-Massey's pure vanilla bean paste. In this recipe, I used 1/2 tsp. You could use a good quality vanilla extract, but the paste includes the seeds, which I think are crucial in a good custard.
October 10, 2010
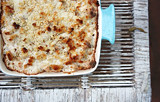
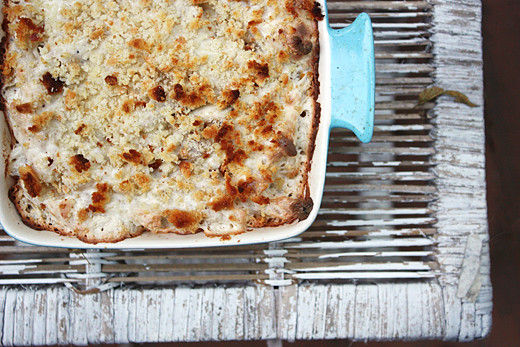
mustard & fontina macaroni cheese
Nigel Slater, in his 'Kitchen Diaries', cooks the way I'd like to: seasonally, spontaneously, depending on what he finds at the market or in his back garden. It always sounds so lovely and grown-up, and every now and then I manage it, but in reality I cook in one of two ways: I make the same thing over and over again, because I'm busy and it's easy, or I read a recipe in a magazine or cookbook or blog and am possessed by a sacred fire to make that thing, right now, whether or not strawberries are in season or I can buy duck breasts at my local supermarket. Sometimes I manage to curb this by bookmarking the recipe (my recipe books are full of brightly coloured flags, and I have thousands of recipes tagged on delicious). Other times nothing will put me off. This macaroni cheese was one of those times.
The first mac and cheese I ever made came from a recipe in (I think) an Australian magazine, and I can no longer find it. I know it involved gruyere, and was delicious, and I've mourned the loss of that recipe for approximately eight years. Like everyone else, I have made and loved Martha Stewart's crack and cheese, to which I always add caramelized onions. I don't think either of these is the perfect mac and cheese, and neither is this one, although all are fantastic and basically, if we were ever to pronounce one recipe perfect, we'd miss out on the fun of aiming for the ideal. Because there is an ideal, Platonic macaroni cheese out there somewhere, I'm sure of it.
This one is bloody good, though. I added caramelized onion to mine, with plenty to serve on the side, because everything tastes better with caramelized onion, especially creamy cheese and pasta. I also added sharp cheddar to bump up the cheese factor and, instead of breadcrumbs, used crumbs from these stilton biscuits. But only because I had them already. I didn't make them specially.
mustard and fontina macaroni cheese
adapted from Nigel Slater, The Kitchen Diaries
1 onion
2 tbsp olive oil
3/4 lb macaroni, penne, or other small pasta
5 cups half-and-half (or milk, or cream)
2 bay leaves
1/2 cup all-purpose (plain) flour
a dash of nutmeg
sea salt & freshly ground black pepper
5oz Fontina cheese
1 cup sharp cheddar cheese
3 tsp grain mustard
1 1/2 cups fresh white breadcrumbs*
5 tbsp grated pecorino cheese
Set the oven to 200ºC/400ºF.
Slice the onion into very thin wedges. Warm olive oil in a skillet, add the onion, and cook, covered, over low heat, for at least 20 minutes. If the onion starts to brown too much, add more olive oil.
Cook the pasta in plenty of boiling salted water until it is almost tender, approximately 8 minutes. Take care not to overcook; the pasta will cook more in the oven. Drain immediately.
Meanwhile, warm the half-and-half in a saucepan with the bay leaves. When it comes to the boil, remove from the heat. Melt the butter in another pan. When it begins to bubble, add the flour and cook, stirring, over a moderate heat, until it is a pale paste. Gradually pour in the milk and whisk until smooth, then simmer over a low heat, stirring regularly, until slightly thickened.
Season the white sauce with pepper, salt, and a dash of nutmeg. Dice the cheeses and stir into the sauce along with the pasta and caramelized onion. Tip the mixture into the gratin dish. Toss the breadcrumbs with the grated pecorino and scatter over the top. Bake for 35 to 40 minutes.
October 7, 2010
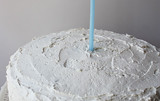
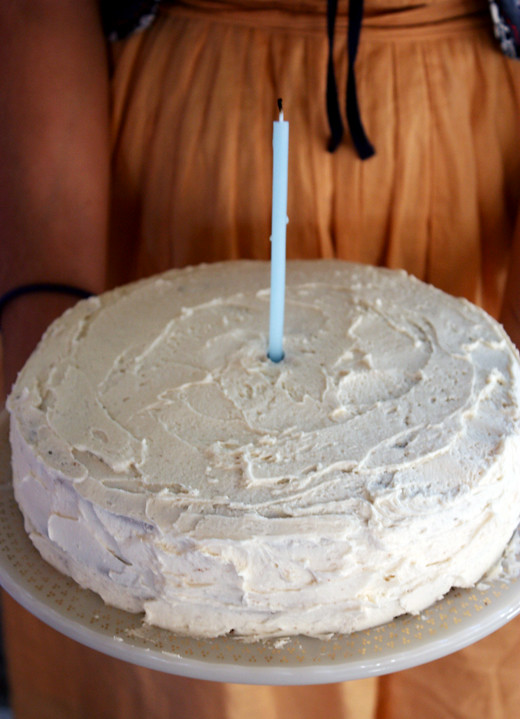
chocolate layer cake with vanilla cream frosting

I love making birthday cakes for other people, and this was for one of the sweetest people I know. I knew I wanted a classic cake that would look simple and beautiful, and taste incredible. So I turned to Mark Bittman; this seemed like a job for the minimalist. I'm not sure that I'll ever need to try another chocolate birthday cake recipe - this one, to me, is perfect. It's fluffy and moist, tastes richly of chocolate, but is still reminiscent (in all the best ways) of packet mix chocolate cake, and isn't much harder to make. There's just a few tweaks that make this cake really special: using good quality unsweetened chocolate, and whisking the egg whites to snowy peaks before carefully folding them in to the cake batter.
I choose to ice it with a simple vanilla buttercream frosting, also from Bittman, because I like the sneaky element of this cake: on the outside it looks all snowy and pure, but really it's just being coy; inside, it's absolutely chocolate. Of course, you could make the frosting chocolate too, by adding melted and cooled unsweetened chocolate, or beating unsweetened cocoa in with the sugar, but I like the simplicity of the vanilla cream.


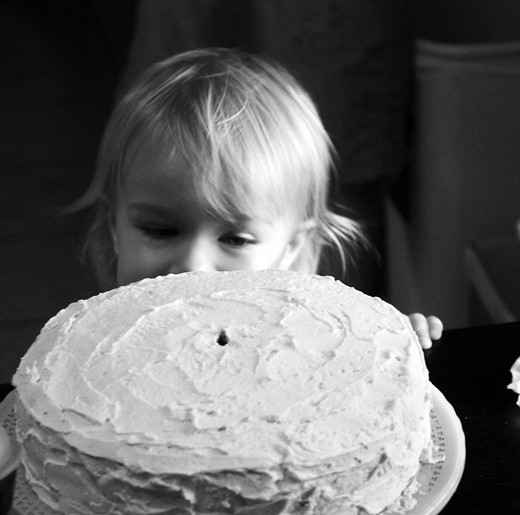
I only had time for a few quick photos of the cake at home, before taking it along to the birthday party it was made for. I couldn't resist posting this one of my cat checking out the photo set-up...

chocolate layer cake with vanilla cream frosting
from Mark Bittman, How to Cook Everything
8 tbsp (1 stick) unsalted butter, softened, plus some for greasing the pans and the paper
2 cups (9 oz) cake or all-purpose (plain) flour, plus some for dusting the pans
3 oz unsweetened chocolate, roughly chopped
1 cup sugar
2 eggs, separated
1 tsp vanilla extract
2 tsp baking powder
1/2 tsp baking soda
1/2 tsp salt
1 1/4 cups milk
Preheat the oven to 350ºF/180ºC. Butter the bottom and sides of two 9 inch layer cake pans; cover the bottom with a circle of waxed/parchment/baking paper, butter the paper, and sift flour over the pans; invert to remove excess flour.
Melt the chocolate in a small saucepan or double boiler. If in a saucepan, cook over very low heat, stirring occasionally. If in a double boiler, cook over hot (not boiling) water, stirring occasionally. When the chocolate is just about melted, remove from the heat and continue to stir until mixture is smooth.
Use an electric mixer to cream the butter until smooth, then gradually add the sugar. Beat until light and fluffy, 3 or 4 minutes. Beat in the egg yolks, one at a time, then the vanilla, and finally the chocolate. In a separate bowl, mix together the flour, baking powder, baking soda, and salt, and add them to the chocolate mixture by hand, a little at a time, alternating with the milk. Stir until smooth, no longer.
Beat the egg whites until they hold soft peaks. Use your hand or a rubber spatula to fold them gently but thoroughly into the batter. Turn it into the cake pans and bake for about 30 minutes, or until a toothpick inserted into the centre of the cakes comes out clean. Cool on a rack for 5 minutes, then invert onto a rack and complete cooling. Don't frost the cakes until they are completely cool. The un-frosted cakes may be stored, covered with plastic wrap, at room temperature for no longer than a day.
vanilla butter cream frosting
adapted from Mark Bittman, How to Cook Everything
Makes enough frosting and filling for 1 (9-inch) layer cake, or 24 cupcakes.
8 tbsp (1 stick) salted butter, softened*
4 cups confectioner's/icing sugar
6 tbsp cream or milk (preferably cream), plus a little more if needed
2 tsp vanilla extract
Use a fork or electric mixer to cream the butter. Gradually work in the sugar, alternating with the cream and beating well after each addition. Stir in the vanilla. If the frosting is too thick to spread, add a little more cream. If it is too thin, refrigerate: it will thicken as the butter hardens.
* The only difference between Mark Bittman's recipe and what I did with this frosting is that I used salted butter. I always use salted butter for frosting, and I think it improves the flavour about 100%.
October 2, 2010
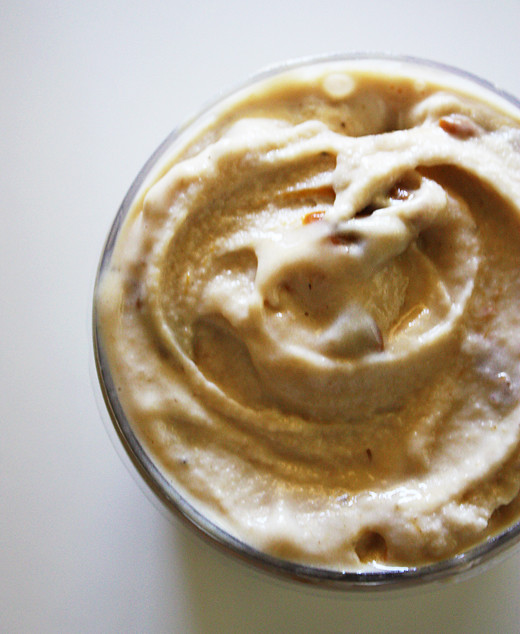
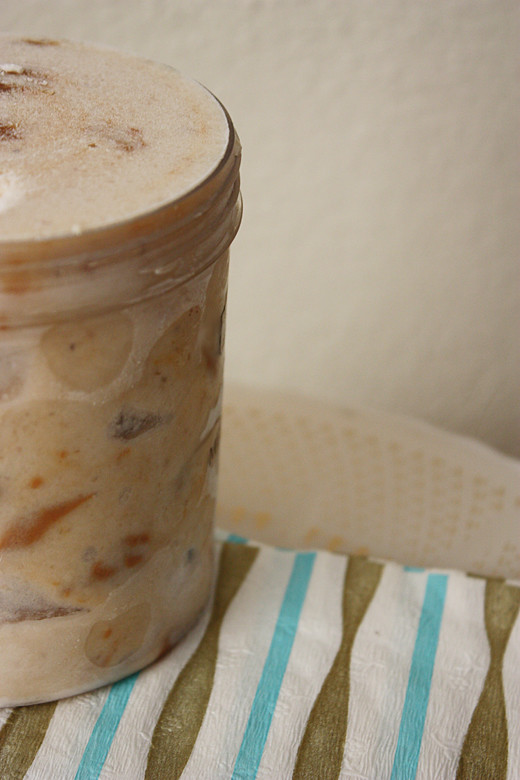
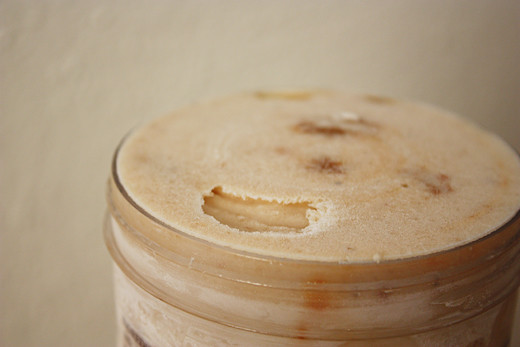
roasted banana ice cream with dulce de leche
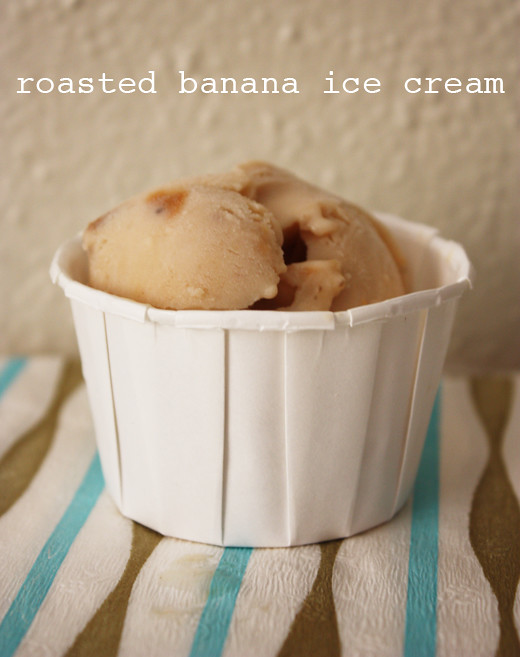
Two weeks ago, in a moment of midnight weakness, I ordered an ice cream machine, mainly because I'd just found this recipe for roasted banana ice cream. Bananas roasted with brown sugar and butter until all their sweet goodness comes out in a sticky syrup; no eggs or cream required, because the consistency of the bananas themselves does all the work; and, as a final touch, globs of dulce de leche stirred in. The result is a complex caramel flavour, not too sweet, and worth buying an ice cream maker for.
roasted banana ice cream with dulce de leche
adapted from Mike's Table
3 ripe bananas
1/3 cup brown sugar
1 tbsp butter
1.5 cups whole milk
2 tbsp sugar
1/2 tsp vanilla extract
juice of 1/2 lemon
1/4 tsp salt
1/4 cup dulce de leche (optional)
* You will need to begin this recipe a day before you plan to eat it.
Preheat oven to 400ºF / 200ºC. Slice bananas into coins. In a baking dish, mix bananas with brown sugar and butter, and bake for 40 minutes, stirring once. Allow to cool slightly.
Scrape the contents of the pan - bananas and sticky caramelized syrup - into a food processor or blender. Add milk, sugar, lemon and salt and puree until smooth. Cover and refrigerate for a few hours.
Once the mixture is cool, churn in an ice cream maker following the manufacturer's instructions for between 15 and 20 minutes.
After churning, mix through globs of dulce de leche. Transfer to a freezer-safe container and freeze overnight to achieve the right consistency.
September 27, 2010
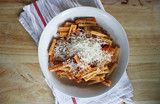
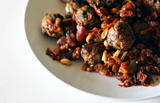
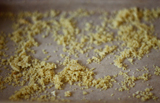
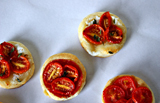
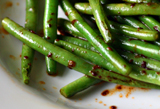
sun-dried tomato & almond pesto

Today was the first day it's felt like autumn in Austin, and if I've ever felt like falling to my knees and kissing the now-less-infernal earth, it was this morning. This sun-dried tomato and almond pesto has been my go-to meal in the busy, hot first weeks of semester, and I think it'll last well into the cooler months. It's seasonal transitional kind of food - a little bit comfort and a little bit light. The ingredient proportions are open to experimentation; these are the ratios I prefer, and I like this with very little garlic. If your sun-dried tomatoes are packed in oil, you might want to use that instead of (or along with) the extra virgin olive oil.

sun-dried tomato & almond pesto
60g whole raw almonds or ground almonds
150g sun-dried tomatoes
40g freshly grated parmesan
1/4 cup extra virgin olive oil
handful of basil leaves
1 small garlic clove, or less, crushed
sea salt & freshly ground black pepper
If using whole raw almonds: place a small pan over medium heat and allow to get hot. Add almonds and toast for a few minutes until they brown, but don't blacken. Remove from the heat and grind in a spice grinder or blender.
If using ground almonds: place a small pan over medium heat and allow to get heat. Add almonds and toast very carefully for approximately one minute. Remove from heat.
Place all the ingredients in a blender or food processor and process to your desired consistency. I like a smoother pesto for these flavours. Check seasoning and serve with pasta and parmesan.
August 30, 2010
honeydew popsicles; or, how to survive August in Texas
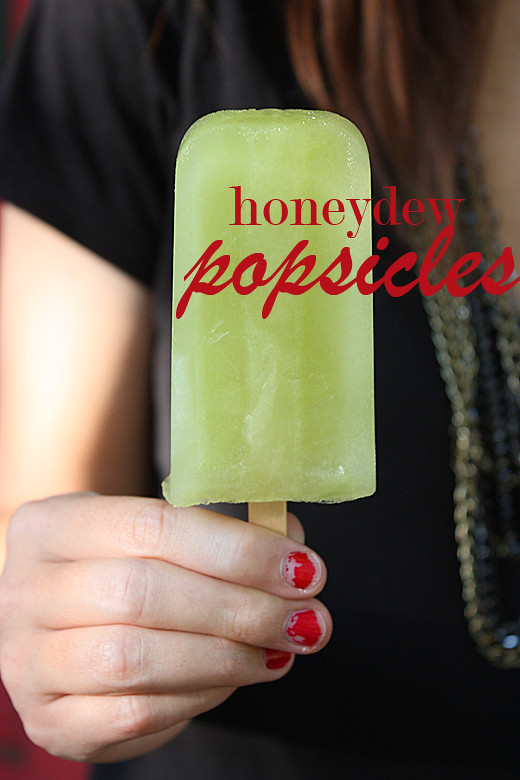
A steady diet of popsicles is the only way to survive August in Austin, and I speak with great authority, since it's now the end of August and I've survived. I love anything melon flavoured; I love these popsicles, which are sweet and simple. I love my friend Kate for modelling them for me, and for still being my friend when I told her that Australians call them iceblocks.
I bought this popsicle mould, which I like because it uses wooden popsicle sticks. I wanted that summery nostalgic woody popsicle stick flavour; it feels essential to me. And you can compost them afterwards, or put them to other uses, so that you don't feel too hedonistic about it.
Also, I can't believe it's been five months since I lasted posted. Can five months really go so quickly? I spent most of my summer at home in Sydney (where it was winter), and another chunk of it driving around the gorgeous American south west. Photos to come. I'm happy to be back in my little kitchen and cooking again (that is, I will be when it gets cool enough to consider turning my oven on).
Honeydew Popsicles
adapted from Martha's honeydew agua fresca recipe
makes 8-10 popsicles
the flesh of one ripe honeydew melon, seeds removed
1/3 cup sugar
1/2 cup fresh lime juice
In a saucepan, add sugar to 2 cups of water and place over a low heat, stirring continually until the sugar dissolves. Remove the sugar syrup from the heat.
Using a blender or food processor, puree the honeydew in batches until smooth. Place a fine-mesh sieve over a large bowl or jug. Pour the honeydew into the sieve and strain into the bowl. Press on the pulp to extract more juice. Discard pulp.
Mix lime juice with the cooled sugar and water. Add slowly to the honeydew juice, testing for sweetness, and stop when you've reached your desired level. Adjust lime juice if necessary. The sweetness of the popsicles will depend entirely on the sweetness of your honeydew. I only ended up using half of the sugar syrup (I refrigerated the remainder to make more popsicles with) but I want to make sure you have a flexible amount to work with.
Pour honeydew mixture into popsicle moulds. Leave in the freezer for approximately 2 hours, or until the popsicles are semi-frozen (this amount of time may depend on the effectiveness of your freezer), and then insert the sticks/handles. Freeze for another 6 hours or overnight before eating. You'll need to run warm water over the popsicle moulds to extract them.
March 31, 2010
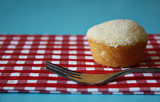
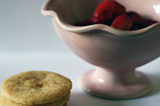
golden eggs

So yes, the food item in the above photograph looks nothing like an egg. It's not even egg shaped. But these tasty little cakes - so simple, but so good, flavoured with nutmeg and topped with butter, cinnamon and sugar - are the usually egg-shaped creation of Gesine Bullock-Prado. I ate one at Walton's Fancy and Staple, a wonderful bakery/cafe here in Austin owned by Gesine's famous sister Sandra, and I declared it the best cake I've ever eaten. That's only likely to be true of you if, like me, you prefer simple cakes, flavoured by only one or two star ingredients (in this case, nutmeg). Also if you like donuts with cinnamon and sugar, because that's what these taste like. They taste deep fried, but they aren't, and this is sort of miraculous.
After my 75 cent best cake ever at Walton's, I went home hoping to find a recipe to recreate the goodness, and found the very one used by the cafe. Not only is it available on Amazon.com, because Bullock Prado has allowed the first 12 pages of her cookbook Confections of a Closet Master Baker to be published online, but she has a video demonstration right here. How generous.
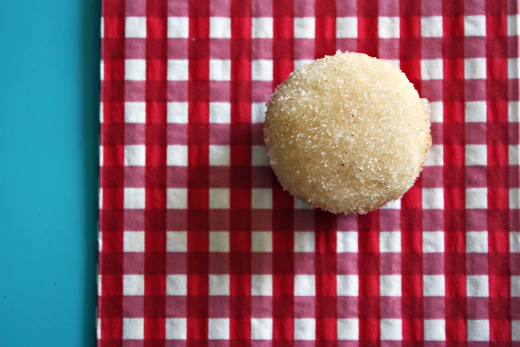
I looked and looked for egg-shaped molds to make these in, but finally decided just to use a mini muffin pan. They would be gorgeous - and very Easter themed - as eggs, but really what matters is how good they taste (preferably with hot, soothing beverages). Two important things: cream the butter and sugar together for a long time, or risk missing out on how extraordinarily good these cakes can be. And only fill your molds to halfway or less, or the cakes will overflow and spread.
Note that this recipe makes a vast amount of mini-muffin-sized cakes - probably something like 60. I planned to experiment with freezing some of them (before dipping them in sugar) and seeing how easily rejuvenated they were later, but kind friends came to my assistance and ate them all before that could happen.
Golden Eggs
Gesine Bullock-Prado, Confections of a Closet Master Baker
3 cups flour
1 tbsp baking powder
1 tsp salt
1 tsp nutmeg
1/2 lb (2 sticks) unsalted butter, at room temperature
2 cups sugar
5 large eggs, at room temperature
1 tsp vanilla extract
1 1/4 cups nonfat buttermilk
For dipping the eggs:
8 tbsp (1 stick) unsalted butter, melted (I used salted butter)
1 cup sugar and 1 tsp cinnamon mixed together in a small shallow bowl
Preheat the oven to 325°F / 160°C. Spray your molds with nonstick spray (I buttered mine).
Sift together the flour, baking powder, salt, and nutmeg. Set aside.
In an electric mixer fitted with either the paddle or the whisk attachment, whip the butter and sugar together until light and fluffy. This can take up to 10 minutes, depending on the temperature of your butter. As you're whipping away, stop and scrape down the sides of the bowl to make sure all the butter is incorporated into the sugar. Keep whipping and keep scraping.
Add the eggs one at a time, whipping after each one until the egg is fully incorporated into the batter. Scrape down the bowl every now and again as well. Add the vanilla.
Once all the eggs are incorporated, alternate adding the flour mixture and the buttermilk, mixing slowly. After they are well incorporated but not overbeaten, take a ribber spatula and fold the batter a few times to make sure everything is evenly distributed and the batter is smooth.
Distribute the batter into your molds, filling each cavity a little less than halfway. Bake for about 15 minutes. Baking time varies depending on the size of your mold, so check for a very light golden brown color and make sure the cake springs back when you touch it. (15 minutes was just right for my mini muffin pan in my oven.)
Unmold your little cakes while they are still warm, dunk them quickly in the melted butter, then dredge them in the cinnamon and sugar.
March 7, 2010
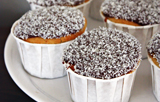
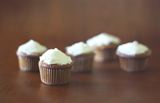
lamington cupcakes

I should say right away that real lamingtons don't look like these - they're cubes of sponge cake, sometimes with jam in the middle, coated in chocolate and sprinkled with coconut. Like this.* According to wikipedia, they're named for the 2nd Baron Lamington, Charles Cochrane-Baillie, who was Governor of Queensland from 1896-1901, and whose household at some point invented them, impromptu, at the very last minute before social disaster. Apparently Lord Lamington (who is famous for shooting a koala on his way home from meeting with conservationists about establishing a national park) hated them.
* Please read the accompanying article. It's like an Australian version of The Onion, only it's real.
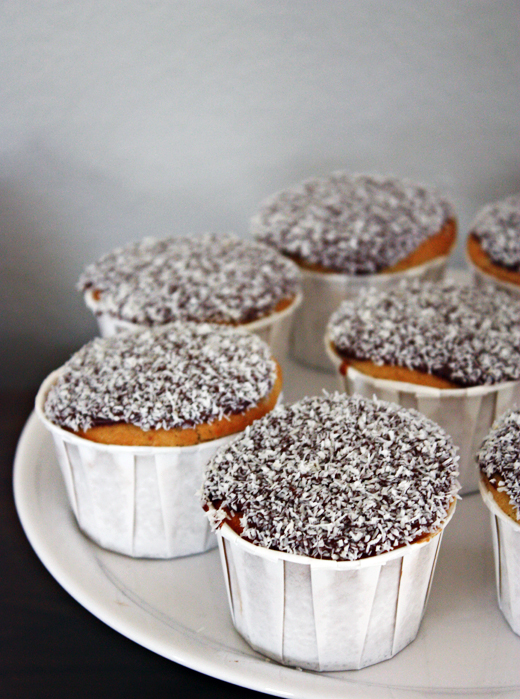
I wanted to make lamingtons for the Australia Day party I held in January, but I had no intention of forming precious cubes and dipping one side and then the other, etc etc. Making cupcake versions is a brilliant idea (not mine; I stole it from the fabulous blog, Boyfriendly Cooking). I'm not sure that any of my American friends knew they were eating a little piece of Australian culinary history, but they seemed to like them anyway (especially the kids present, who helped me ice them, and who I may employ in that capacity for every cupcake I make from now on).

Lamington Cupcakes
from Boyfriendly Cooking
1 1/4 cup all-purpose unbleached white flour
3/4 teaspoon baking powder
1/2 teaspoon salt
1/3 cup dessicated coconut
3/4 stick unsalted butter
3/4 cups sugar
2 eggs
1 1/2 teaspoons pure vanilla
1/2 cup + 2 tablespoons milk
Chocolate icing: 1 cup icing sugar
1 Tablespoon cocoa
more dessicated coconut for dunking
very hot water
Heat oven to 350F. Whisk flour, baking powder, salt and coconut together. In a second bowl, cream the butter and sugar until light and fluffy. Add eggs one at a time. Beat in vanilla. Add flour mixture and milk alternately. Scrape the bowl and sides to make sure everything is mixed.
Fill muffin papers about 2/3 full. Bake for 20 minutes. Transfer to a wire rack to cool.
To make chocolate icing: sift icing sugar and cocoa and mix together. Add hot water a teaspoonful at a time, or less, until you have the consistency you want. You don't want this icing to be too runny.
When cupcakes have cooled, spread the chocolate icing on the top and then dunk the cupcake top into a bowl of dessicated coconut. Repeat.
March 2, 2010
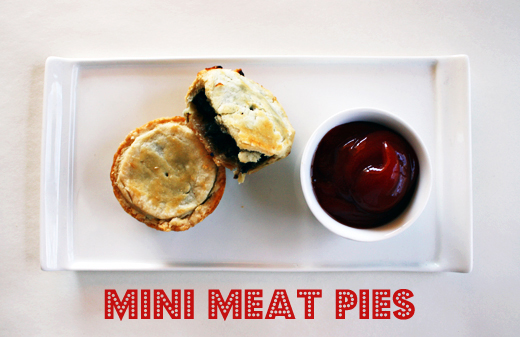
mini meat pies
I've been an Australian expat for eight years now - with some much-needed months-long intervals at home - but this is the first year it's ever occurred to me to throw an Australia Day party. I think there must be something about Texas that inspired me. Also, this is the first time I've been the only international among a group of friends - my closest friends here are all American, and I love them very dearly, and I thought they needed to eat things like meat pies, sausage rolls, pavlova and lamingtons. I was also hugely impressed by their collective ability to produce decorative Australiana, which far outstripped my own. My favourite was the gorgeous map of my country, hand-drawn and beautifully painted, by a wonderful 6 year old friend.
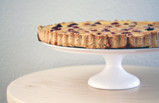
So, back in January: the most kitsch Australia Day ever, but very delicious. I also served tiny hamburgers complete with beetroot (beets - an essential component of the Aussie burger), fairy bread (white bread with butter and sprinkles, which I cut into the shape of Australia, and which the abovementioned 6 year old was a big fan of), a green and gold salad, and a lime and coconut cheesecake with a macadamia crust (macadamias are native to Australia). And yes, there were prawns (shrimp) on the barby.
This is Australian Gourmet Traveller's recipe for mini meat pies - or party pies, as we call them - so they're all steak, shallots, garlic and red wine. The result is probably more French than Australian, but they're unbearably delicious, and you definitely don't need to wait for imperialist national holidays to serve them. The recipe suggests topping them with puff pastry, but I chose to make a double batch of shortcrust. Serve them with tomato sauce (ketchup) - AGT says "homemade or good quality", and I say Heinz or Fountain.
The filling takes some time to cook and cool, and is best made the day before you assemble the pies.

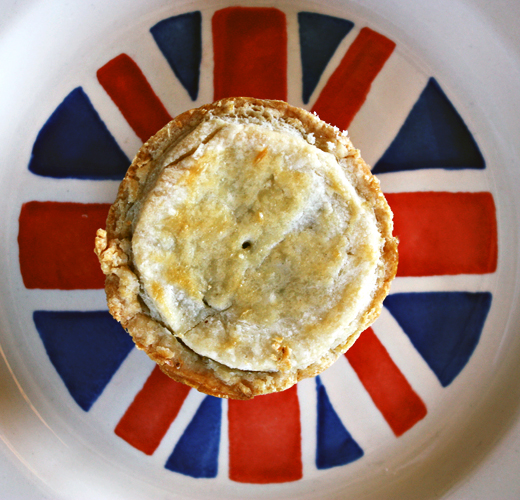
PS I know it's disgraceful of me to use props with Union Jack on them for an Australia Day post, but this gorgeous Emma Bridgewater plate was the closest thing I could find to an Australian flag.

Mini Meat Pies
from Australian Gourmet Traveller
2 tbsp olive oil
600g chuck steak, chopped into 2cm pieces
for dusting: seasoned plain flour
4 shallots, coarsely chopped
3 garlic cloves, coarsely chopped
200ml dry red wine
200ml beef stock
1/4 cup (firmly packed) thyme leaves
1 egg, lightly beaten
for shortcrust pastry:
240g plain flour, sieved
180g cold unsalted butter, coarsely chopped
1 tsp salt
Heat oil in a large saucepan over high heat. Dust steak in flour, shake off excess, and cook in batches until golden, stirring occasionally (3-5 minutes). Remove from saucepan with a slotted spoon and set aside. Add shallots and garlic to pan, saute until golden (3-5 minutes). Add red wine, reduce by half (3-4 minutes), then add stock and thyme. Reduce heat to low, add steak, cover and simmer until tender (2-2 1/2 hours). Uncover and cook until sauce is thick (30-40 minutes). Season to taste, set aside to cool, then refrigerate until cooled completely.
To make the pastry, process flour, butter and 1 tsp salt in a food processor until just combined. Add 80ml iced water, a little at a time, and pulse just until a dough forms. Form into a disc, wrap in plastic wrap and refrigerate to rest (1 hour).
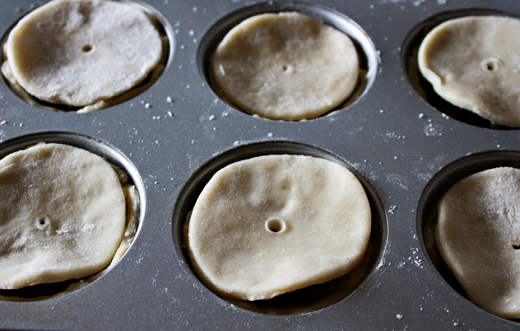
Preheat oven to 200°C / 400°F. Roll pastry to 5mm thick and cut twelve 9cm-diameter rounds. Line a 12 x 60ml capacity muffin tray with pastry and refrigerate to rest (30 minutes). Meanwhile, cut twelve 7cm-diameter rounds of puff pastry and refrigerate until required. (Note that I made two batches of shortcrust and didn't top the pies with puff; this meant I could make 18 pies from the amount of filling I had.)
Divide pie mixture among pastry cases, fold in pastry edges, then brush with eggwash and top with pastry circles. Press edges together and refrigerate to rest (30 minutes). Brush with eggwash and then cook until golden and cooked through (15-20 minutes). (As you can see, I made a small hole in the top of each pie. The hole allows steam to escape, and I like the way it looks.)
* The AGT recipe says it makes 12; mine stretched to 18.
February 28, 2010
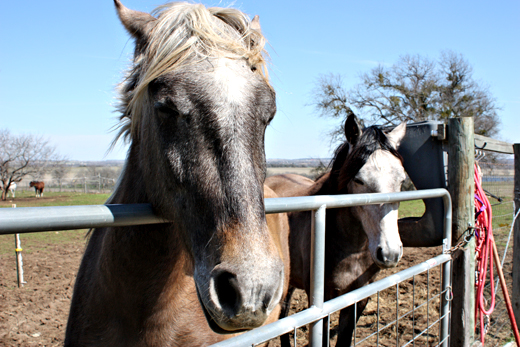
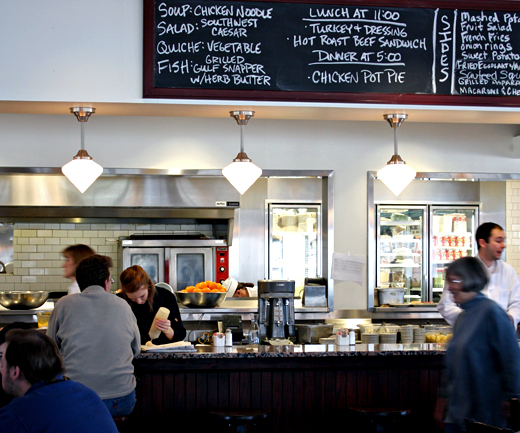
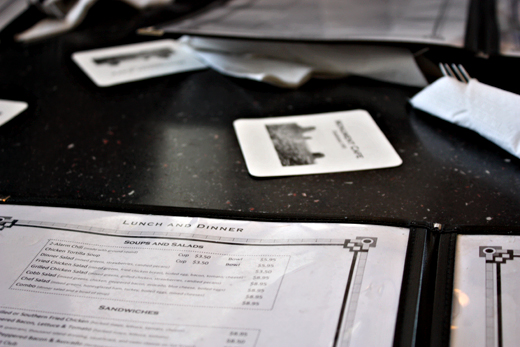
tx

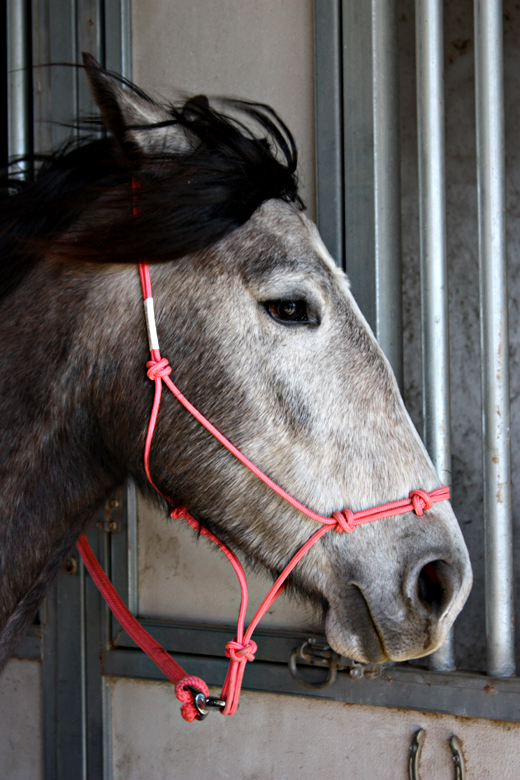
I've discovered something about food blogs and graduate school: they're often mutually exclusive. This semester has been manic, but I took today off and spent it in lovely Georgetown, Texas, just north of Austin, meeting a friend's horses, doing some low-level antiquing, eating hamburgers and drinking chocolate shakes at the fabulous Monument Cafe, and taking photos for the first time in weeks and weeks. They make my life look much more pastoral, horse-y and Texan than it really is (as evidence of my inexperience with these things, I managed to shock myself on an electric fence while taking one of these pictures. It felt kind of - snappy).
I have so many delicious things to share with you, including the tasty things I made for Australia Day way, way back in January. Coming soon (because so is Spring Break).


January 13, 2010
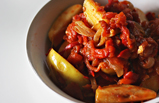
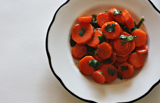
roast pepper, tomato & apple salad

Who knew that throwing some apples in with roasted red peppers (capsicums) and tomatoes could taste so fabulous? That touch of sweet fruit in amongst the chili and garlic makes all the difference. I made this salad as part of my Arabian Nights feast, and it all vanished quickly.
Roast Pepper, Tomato & Apple Salad
adapted from Claudia Roden's Arabesque
3 fleshy red bell peppers (capsicums)
1 large onion, sliced in wedges
3 to 4 tbsp extra virgin olive oil
2 garlic cloves, chopped
1 lb (450g) tomatoes, peeled and chopped
1 or 2 chili peppers, left whole
salt and black pepper
2 sweet apples (such as Golden Delicious)
Place the peppers (capsicums) on a sheet of foil on an oven tray under a preheater broiler (grill), 2.5 to 3.5 inches from the heat. Turn them until their skins are black and blistered all over. Alternatively - and more easily - roast them in the hottest oven for about 30 minutes, or until they are soft and their skins blistered and blackened, turning them once after 15 minutes.
To loosen the skins further, put them in a strong plastic bag, twist in shut, and leave for 10 to 15 minutes. When the peppers are cool enough to handle, peel them and remove and discard the stems and seeds. Now cut the peppers lengthwise into ribbons.
In a wide pan, fry the onion in 2 tablespoons of olive oil over a medium heat, stirring often until they are lightly coloured. Add the garlic and stir until it just begins to colour, then add the tomatoes and chili peppers. Season with salt and pepper and cook gently for about 20-30 minutes.
Leaving the peel on, core the apples, quarter them, and then halve each quarter. Stir the red pepper ribbons into the onion mixture, then add the apple slices. Cook gently until the apples are tender, adding a little water if the pan becomes too dry.
Serve cold, drizzled with the remaining olive oil.
January 11, 2010
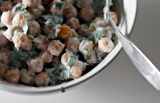
chickpea & yoghurt salad
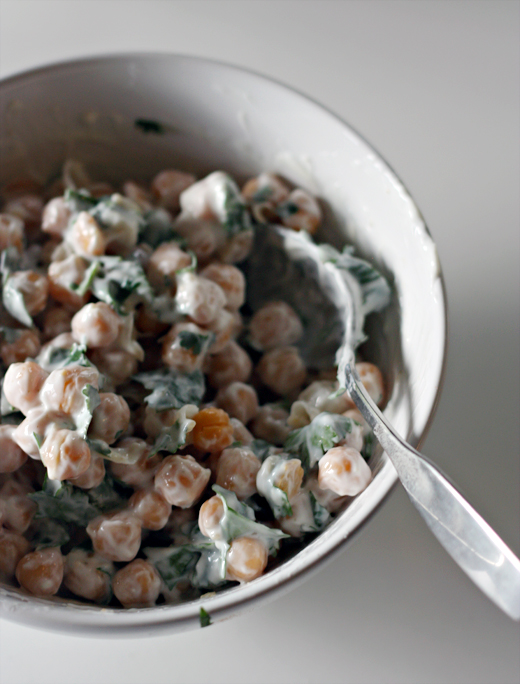
Another dish I made for my Arabian Nights feast: a smooth, flavourful salad of chickpeas with yoghurt, cumin, coriander (cilantro) and mint. Using fresh chickpeas would make this even tastier; just make sure you soak them overnight. I sprinkled this with pomegranate seeds just before serving - pretty and delicious.
Chickpea & Yoghurt Salad
400g (14 oz) tin chickpeas, well rinsed and drained
3/4 cup plain Greek yoghurt
1/4 tsp ground cumin
1 tsp caster (superfine) sugar (or ordinary sugar)
1 small handful coriander (cilantro) leaves, roughly chopped
1 small handful mint leaves, roughly chopped
1 tsp salt
pomegranate seeds (optional)
Mix the chickpeas, yoghurt, ground cumin, sugar, coriander, mint and salt in a bowl and stir to combine thoroughly. Adjust the seasoning if necessary, cover and refrigerate for at least 1 hour before serving. Sprinkle with pomegranate seeds to serve.
January 8, 2010
turkish meatballs: lamb with mint & cinnamon, beef with parsley & cumin

These were the only non-vegetarian element of my Arabian Nights feast: two varieties of tasty meatballs with a Turkish twist, both served in a sticky, garlicky tomato sauce. The first kind match lamb with mint (I love that flavour combination) and the tiniest taste of cinnamon, while the second variety combine beef with even stronger flavours: cumin, parsley and pine nuts. I love pine nuts in meatballs; I also love them lightly toasted and scattered over dishes like this, and couscous.
There's no need to make both kinds for the one feast, of course. I did things this way because I wanted to experiment, and I couldn't tell you which flavour I prefer. They're both great. They'd be a tasty ordinary meal as well, served with rice and a salad, and although there's the bother of shaping each individual meatball, they cook very easily in the oven and then in the sauce. And the sauce itself is really simple to prepare.
If you're making this dish as part of a feast, it's a good one to get started on early, although of course you don't have to. I put together the meat mixture the day before and refrigerated it; the cold mix was easier to form into meatballs on the day of the meal. I also made the sauce the day before, which I'm sure only improved the flavour.
Turkish Meatballs
adapted from Claudia Roden's Arabesque
For the tomato sauce:
1 small onion, chopped
2 tbsp extra virgin olive oil
2 garlic cloves, chopped
1 chili pepper, seeded and chopped, or 1/2-1 tsp dried chili flakes
1.5 lbs (680g) tomatoes, peeled and chopped
salt and black pepper
1 to 2 tsp sugar
For lamb meatballs:
1 lb (450g) ground (minced) lamb
salt and black pepper
1/2 a small onion, very finely chopped
handful of finely chopped mint
1/2 tsp cinnamon
For beef meatballs:
1 lb (450g) ground (minced) beef
salt and black pepper
1/2 a small onion, very finely chopped
handful of finely chopped parsley
1 tsp ground cumin
handful pine nuts
olive oil
To make the meatballs, season the meat with salt and pepper and work into a soft paste with your hands. Add the onion, mint and cinnamon to the lamb, and the onion, parsley, pine nuts and cumin to the beef. Form into small walnut sized balls with your hands.
Put some olive oil in a soup plate or shallow bowl. Preheat the oven to 200°C/400°F.
Roll each meatball in the oil, then place in a baking dish. Bake for 15-25 minutes, until their colour changes.
To make the tomato sauce, fry the onion in the oil until soft. Add the garlic and chili pepper (or dried chili flakes), and stir for a moment or two. Put in the tomatoes, season with salt, pepper and sugar, and cook over a medium heat for 10 minutes, until they soften and the sauce is reduced. You want a sticky sauce that isn't particularly liquid.
Add the meatballs, and cook for a further 15-20 minutes. Serve immediately, sprinkled with extra pine nuts.
January 7, 2010
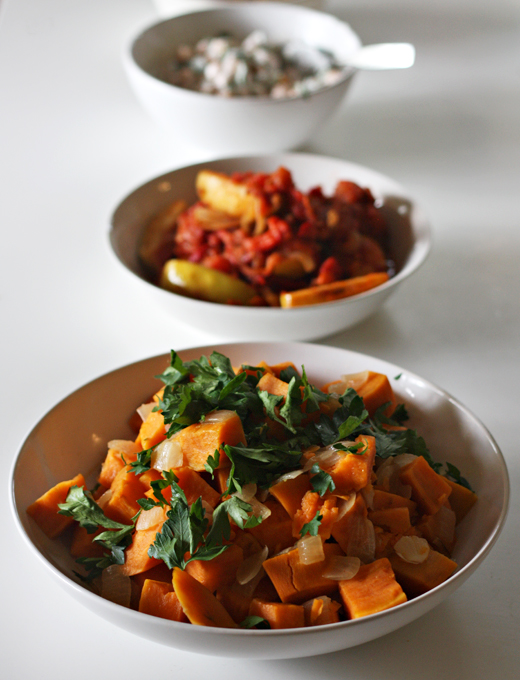
moroccan sweet potato salad

This warm salad, which I served as part of my Arabian Nights feast, would also be fabulous with a roast chicken (maybe smeared with some harissa) and pilaf rice.
Moroccan Sweet Potato Salad
adapted from Claudia Roden, Arabesque
1 large onion, coarsely chopped
5 tbsp extra virgin olive oil
1 lb (450g) sweet potatoes, peeled
1/2 tsp ground ginger
1/2 tsp ground cumin
1/2 tsp paprika
salt
juice of 1/2 lemon
2 tbsp chopped flat-leaf parsley
6 or 7 green olives (optional)
Fry the onion in 2 tablespoons of oil until golden. Cut the sweet potatoes into pieces (about 1-inch cubes), add to the pan, and barely cover with water. Add the ginger, cumin, paprika, a little salt, and 2 more tablespoons of oil. Cook until the potato pieces are tender, about 20 minutes - keep watch so that they don't suddenly fall apart. The liquid should reduce to a sauce, but I found that I had more than I needed.
Serve at room temperature, mixed with the olives (if using - I just don't like olives!), and sprinkled with lemon juice, the remaining olive oil, and the chopped parsley.
moroccan carrot salad
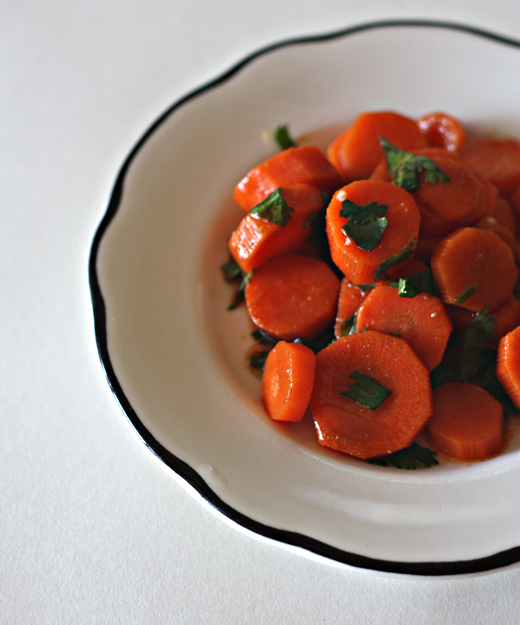
A simple, delicious way of dressing carrots to go with the rest of my Arabian Nights feast.
Moroccan Carrot Salad
adapted from Barry Vera's Feast Bazaar
500g (1lb 2 oz) carrots, peeled and sliced into 5mm (1.4 in) rounds
60ml (1/4 cup) white wine vinegar
1 tsp ground cumin
1 tsp paprika
1 1/2 tsp caster (superfine) sugar (or ordinary sugar)
2 tbsp lemon juice
1-2 tbsp extra virgin olive oil
1 handful coriander (cilantro) leaves, roughly chopped
sea salt, to taste
Cook the carrots in a large saucepan of boiling, salted water until just tender (5-10 minutes). Drain and refresh in cold water, then drain again.
In a bowl, mix together the vinegar, cumin, paprika and sugar. Taste, and add extra virgin olive oil until you like the mix. Stir in the carrots, making sure they're well coated with the spice mixture. Then mix in the lemon juice and coriander (cilantro), season with sea salt, and serve.
January 6, 2010
arabian nights feast

I haven't really talked about this on O Pistachio before, but one of my favourite things about cooking is putting together sumptuous menus and spending days planning, shopping for and cooking them, only to watch my friends eat everything in a couple of hours. I'm less interested in perfectly curated three/six/ten course meals, though they can be fun (and I admire people who can pull them off); I'm more excited by tables laden with food that everyone can help themselves from.
The kind of food I love to make for this kind of event is a mix of things from countries like Morocco, Spain, Lebanon, Turkey, Syria and Iran - anywhere with an Arab influence in the national cuisine. I love the way this food manages to feel extravagant and healthy all at the same time (perfect new year food), and it looks so beautiful on the table sprinkled with herbs and pomegranate seeds. It caters for all tastes, too - most of it's vegan, but you can include one or two meat dishes. And most importantly, it tastes fantastic.
So, over the next few days, I'm going to post the menu of an Arabian Nights dinner party I held recently, including recipes for Moroccan carrots with cumin and coriander, Turkish lamb meatballs with mint and cinnamon, and chickpeas with yoghurt and pomegranate seeds. And I'm starting with my go-to couscous recipe from the queen of this kind of cooking, Claudia Roden.
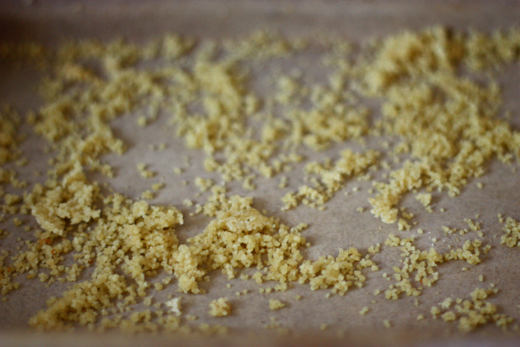
Couscous
from Claudia Roden, Arabesque
This is Claudia Roden's method for preparing the precooked couscous that's available in most supermarkets. It's nice to make in the dish you'll serve it in, complete with its broth, but I also like to pile couscous up on a platter and sprinkle it with coriander (cilantro) and toasted pine nuts or almonds. This amount should serve about 6 people.
You always need the same amount of salted water as couscous.
Put 2.5 cups couscous in an oven dish. Gradually add 2.5 cups warm salted water, made with 1/2 to 1 tsp salt, stirring vigorously so that the water is absorbed evenly. Leave it to swell for about 10 minutes. Preheat the oven to 200°C/400°F.
After the couscous has swelled, mix in 2 tablespoons oil and rub the couscous between your hands above the bowl to air it and break up any lumps. That's the important part.
Bake the couscous for 20 minutes, or until it is steaming hot. Before serving, work in 3 tablespoons of butter cut into small pieces, or 2 to 3 tablespoons of oil, and fluff it up again, breaking up any lumps.
January 3, 2010
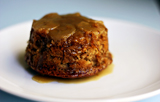
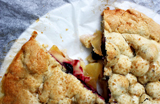
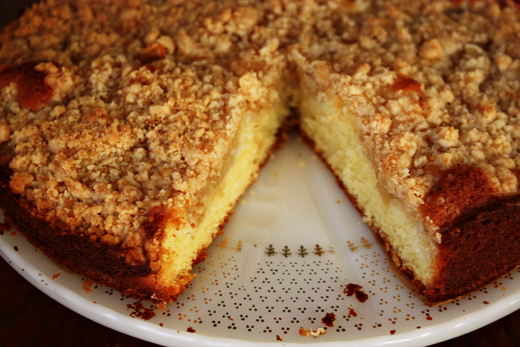
pear & ginger crumble cake
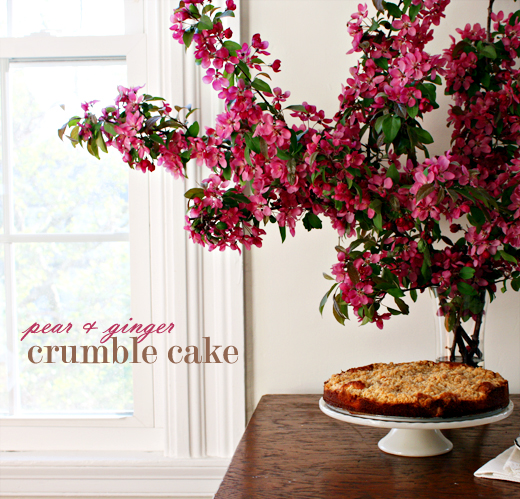
On January 3 2009 - one year ago today - I lived in a small town in New Hampshire. There had been snow on the ground since October, and all the revelry of Christmas and New Year was over. I was left with a great deal of washing up, all kinds of vows to de-tox, and my new year's resolutions, one of which was to start the food blog I'd been thinking about for years. On January 3, I stopped thinking, joined blogger, and made my very first post. I remember thinking at the time how incredibly awkward the first post of a blog is. I'm so glad I persisted through that awkwardness!
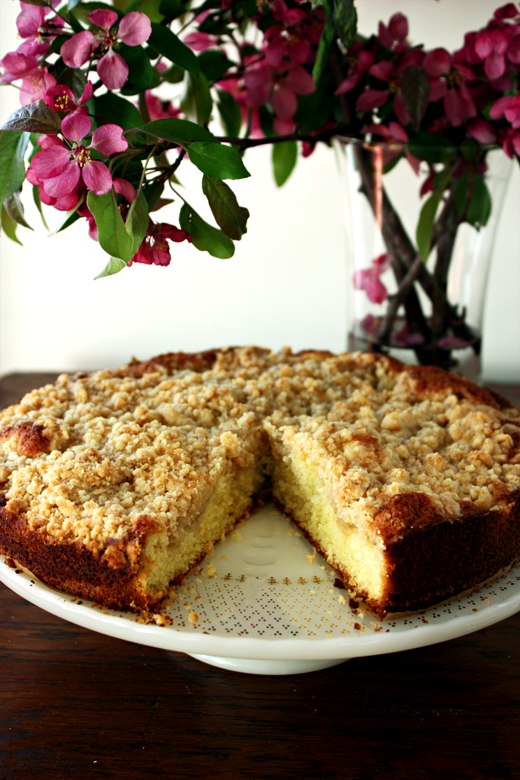
This recipe for pear and ginger crumble cake is sort of cheating, because it's a leftover from my time in New Hampshire, but that seemed appropriate for this anniversary. I cooked it in the spring, which is why the photos are full of frothy blossoms. It's one of the last things I made in that apartment, actually, and the photos and recipe were sort of lost during a summer in England and the busy transition to Texan life. This is a New England sort of cake, too. It's not too sweet - just comforting and crumbly and perfect with a cup of tea.
Thank you so much for reading O Pistachio throughout the past year - it's been encouraging, scary and lovely all at once. I'm looking forward to all the tastiness of the year ahead. Happy 2010 to you all!


Pear & Ginger Crumble Cake
adapted from Tamasin Day-Lewis' rhubarb & ginger crumble cake in Tamasin's Kitchen Classics
serves 8
For the crumble:
110g / 4oz plain flour
4 tbsp light muscovado sugar
85g/3oz unsalted butter
For the fruit:
750g / 1lb pears
1 tsp ground dried ginger root
For the cake:
170g / 6oz unsoftened, unsalted butter
170g / 6oz white sugar
1/2 tsp of vanilla
3 eggs, beaten
170g / 6oz plain flour
2 tsp baking powder
1 tbsp milk
Preheat the oven to 190°C/375°F/gas 5. Butter a 25cm / 10in springform cake tin and line the base with baking parchment. Pulse all the crumble ingredients together briefly until they cohere in a crumbly way. Toss the chopped pear with the ginger in a bowl.
Beat the butter and sugar for the cake together with an electric beater until they are pale and fluffy. Beat in the eggs, a little at a time, sprinkling in a tablespoon of sifted flour when you have added about half the beaten egg to stop it curdling. Sift in the rest of the flour and baking powder and fold in gently but thoroughly. Fold in the milk.
Peel the pears and chop into 1cm / 1/2 inch chunks. Mix with the ginger.
Scrape the cake mixture into the cake tin. Follow with the pears, and sprinkle the crumble on top. Bake for about an hour. The crumble should be golden and crunchy and the pear cooked through by then. Place on a rack and cool for 15 minutes, then either release the spring and unmould the cake to serve warm with cream, or leave until cold to turn out and eat for tea.
Subscribe to:
Posts (Atom)

